Overview
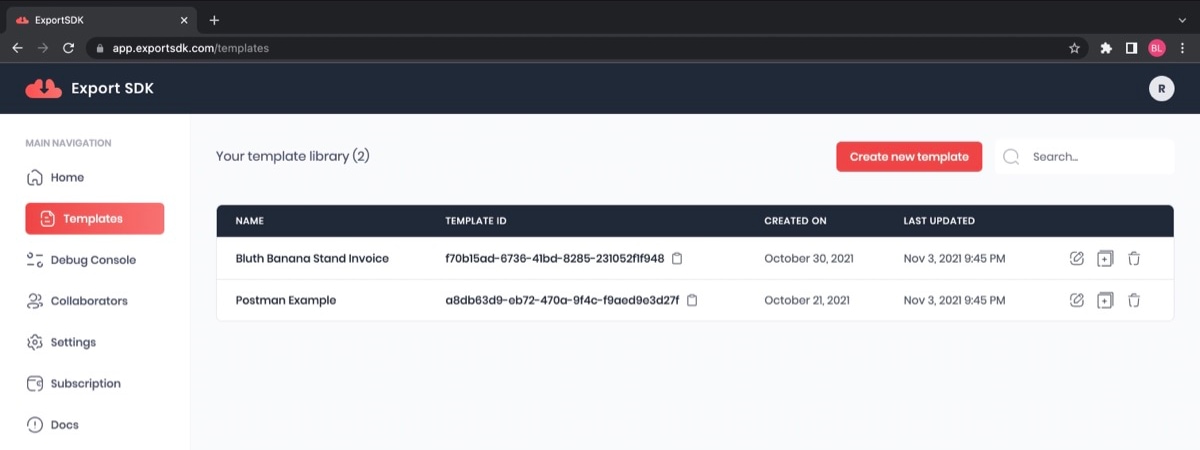
To open the editor, navigate to the templates section by clicking the 'Templates' link on the sidebar.

Every template you've created lives here. The icons to the right of each row allow you to duplicate, or delete a template.
Create a new template from scratch or with a prebuilt template by clicking the links underneath the table of templates.
If you select a prebuilt template, you can edit and customize to your liking.
Using the template editor#

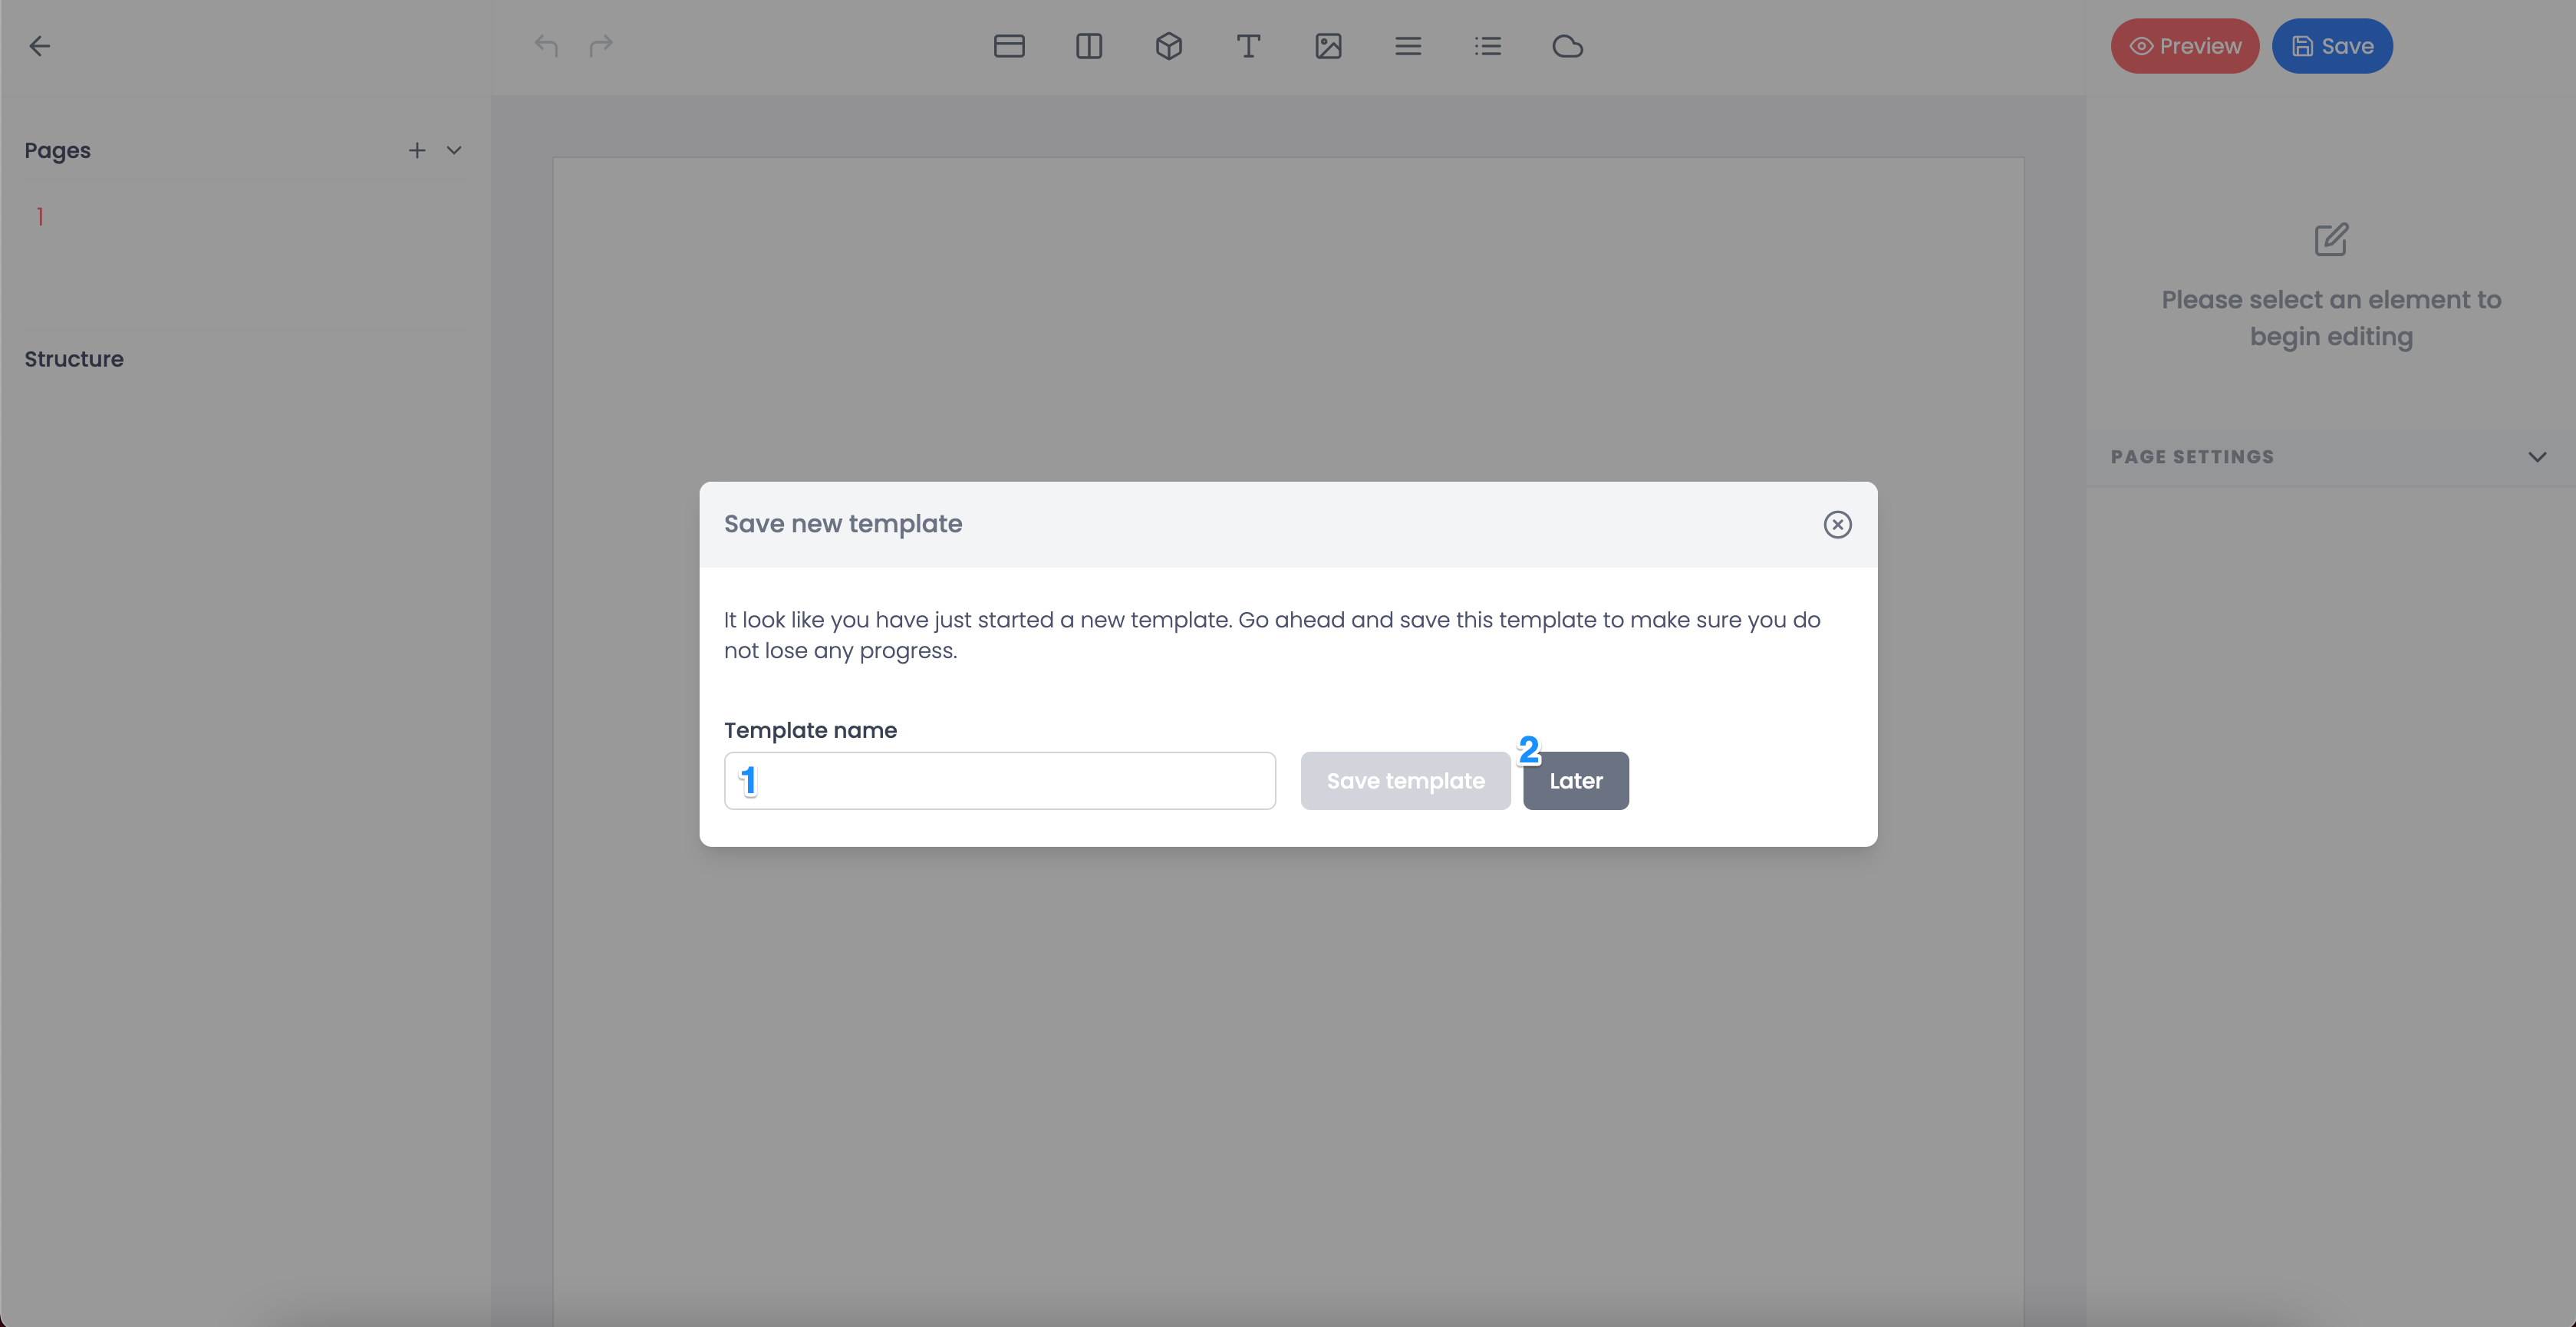
When you create a new template, you will be asked to give you template a name.
Every template requires a name for easy reference (see 1), but saving is optional (see 2).
You can manually save your template at any time. However, templates are also autosaved during the editing process.
Overview of the editor#
The editor was built to mimic common design tools. If you've used Figma or Sketch, the layout should feel familiar.

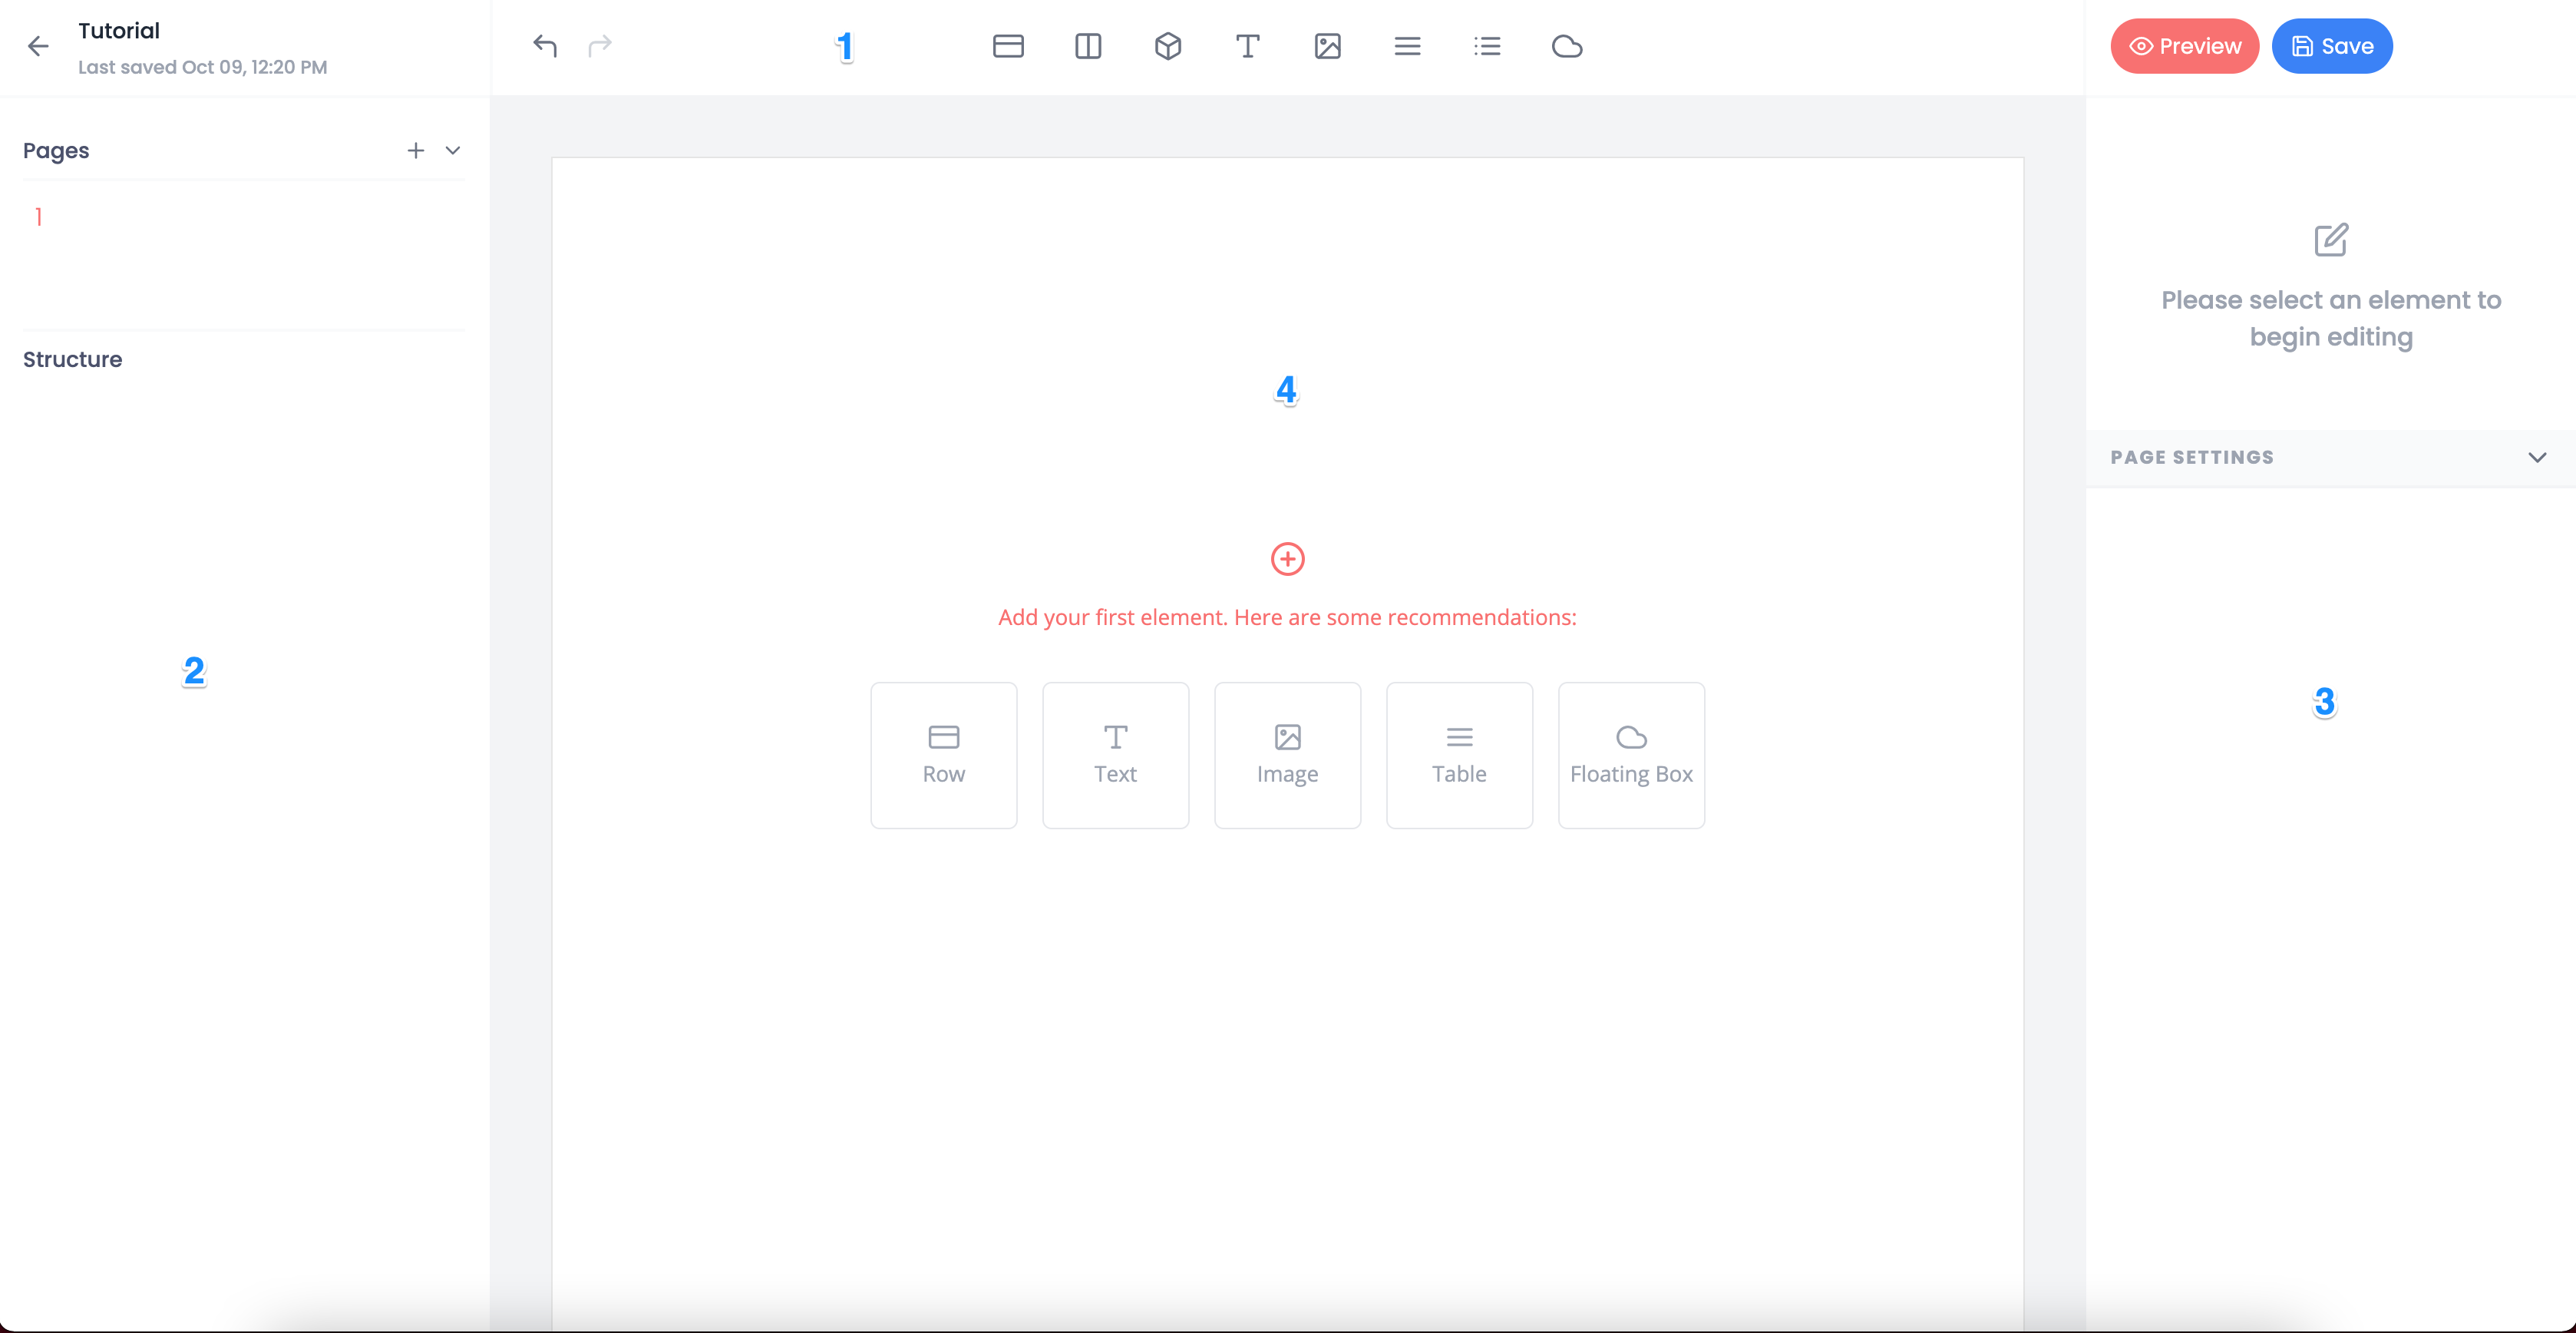
The editor is made up of four sections:
- The header (top 1)
- The page structure (left 2)
- The formatting options (right 3)
- The canvas (4)
The header contains access to quick actions like a back button that takes you out of the editor to the dashboard, manual save, undo / redo, and a palette of elements you can add to your canvas.
The left side holds the structure of your template. The 'Pages' section at the top is where you toggle between pages. This is where you would create a new page or jump to an existing page.
Beneath the 'Pages'section is the element tree for the current page. This provides an overview of all the elements within your page. The elements can modified by clicking on the edit button, the duplicate button, the trash button, or dragged and dropped to different locations within the tree.
The right side contains the styling options for each element on the page. You can learn more about this section here: Attributes and Styling.
The last and main section is the canvas. The canvas is where you will construct the elements that make up your template. We'll cover the canvas in more detail in the next few pages.